In this tutorial, you will learn how to install MySQL Server and its group of supporting components on a Windows computer using the MySQL Installer, a simplified tool for easy installation.
Upon traversing this walkthrough, your system shall stand equipped with the MySQL Server, accompanied by vital tools, poised for experiential exploration and analytical deep dives.
For alternative ecosystems like Linux or Ubuntu, navigate to these tailored pathways:
- Deploying MySQL 8 on CentOS 7
- Configuring MySQL 8 on Ubuntu
Retrieving the MySQL Installer
To unfurl MySQL within the Windows enclave, the MySQL Installer is your primary vessel. This wizard-led tool orchestrates a fluid experience, packaging together pivotal utilities:
- MySQL Server
- MySQL Workbench
- MySQL Shell
- MySQL Documentation
- Universal Connectors
Obtain the installer by venturing to: http://dev.mysql.com/downloads/installer/
In this chronicle, we’ll wield the MySQL Installer 8.0.34, which encapsulates the essential framework: the Server, Workbench, and Shell.
Executing the Installation of MySQL Components
Initiate the process by double-clicking the .exe of the downloaded installer and follow these curated steps:
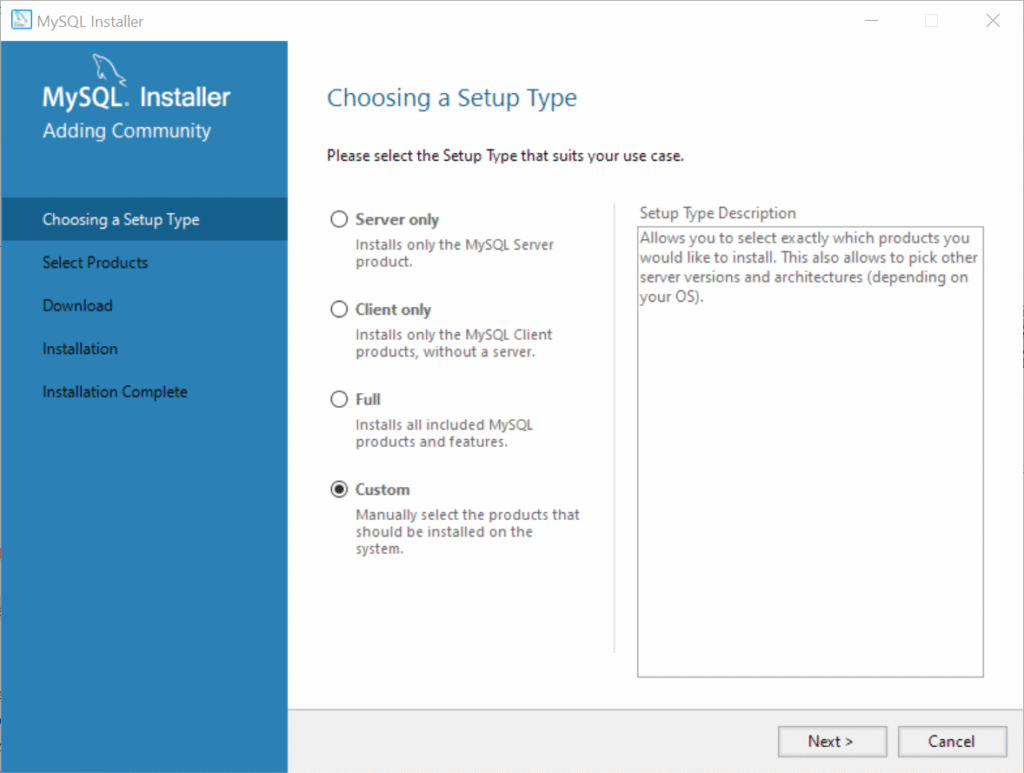
◉ Step 1: Selecting the Installation Archetype
You are asked to select the configuration model at the beginning. For this narrative, elect Custom Setup — the most versatile choice, granting precise control over what to include.
◉ Step 2: Curating Desired Modules
Since we’ve embraced the Custom route, you’ll be presented with a catalog of modules. Cherry-pick the following trinity:
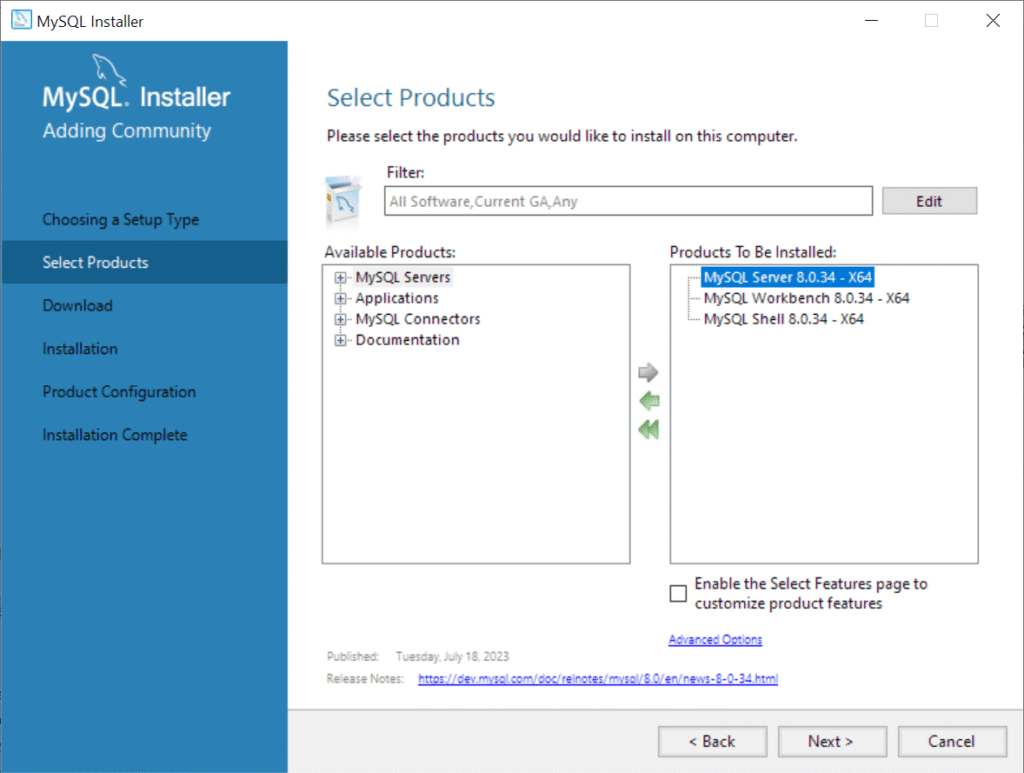
- MySQL Server 8.0.34 – x64
(Path: MySQL Servers > MySQL Server > MySQL Server 8.0 > MySQL Server 8.0.34 – x64) - MySQL Workbench 8.0.34 – x64
Path: Applications > MySQL Workbench > MySQL Workbench 8.0 > MySQL Workbench 8.0.34 – x64 - MySQL Shell 8.0.34 – x64
MySQL Shell 8.0 > MySQL Shell 8.0.34 – x64 (Path: Applications > MySQL Shell)
Add each component using the + icon followed by the arrow to queue it for installation. Advance by pressing Next.
◉ Step 3: Fetching the Selected Artifacts
The installer shall commence fetching the chosen software packages from the ether. A reliable internet connection is imperative — allow several moments for the download ritual to complete.
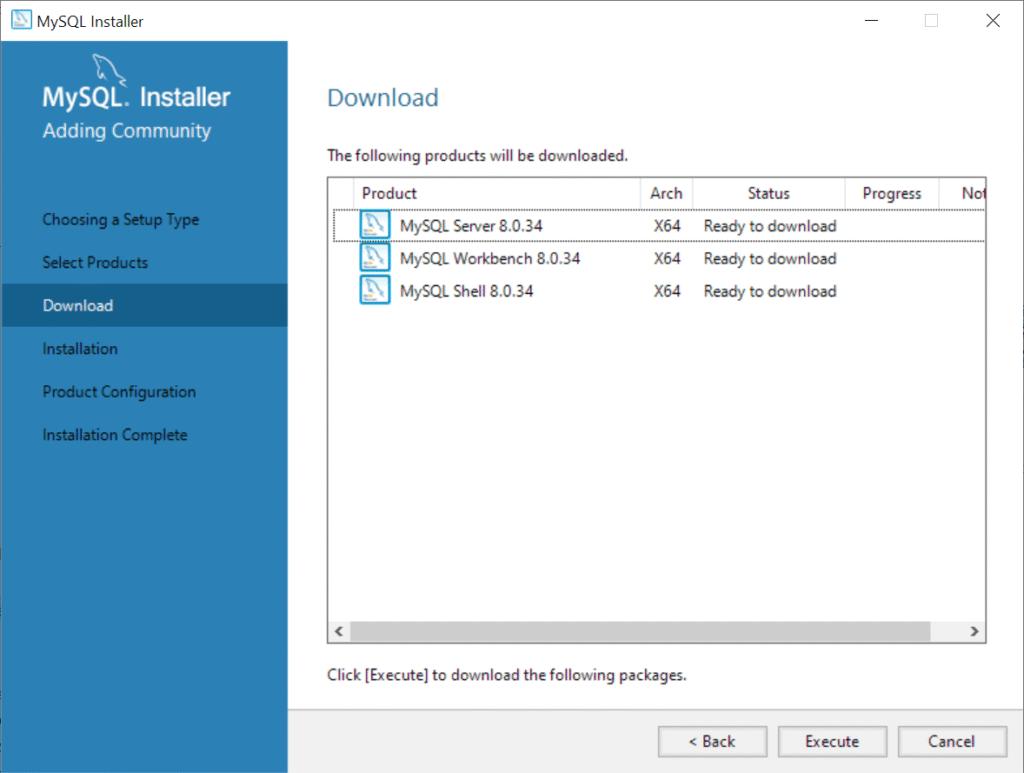
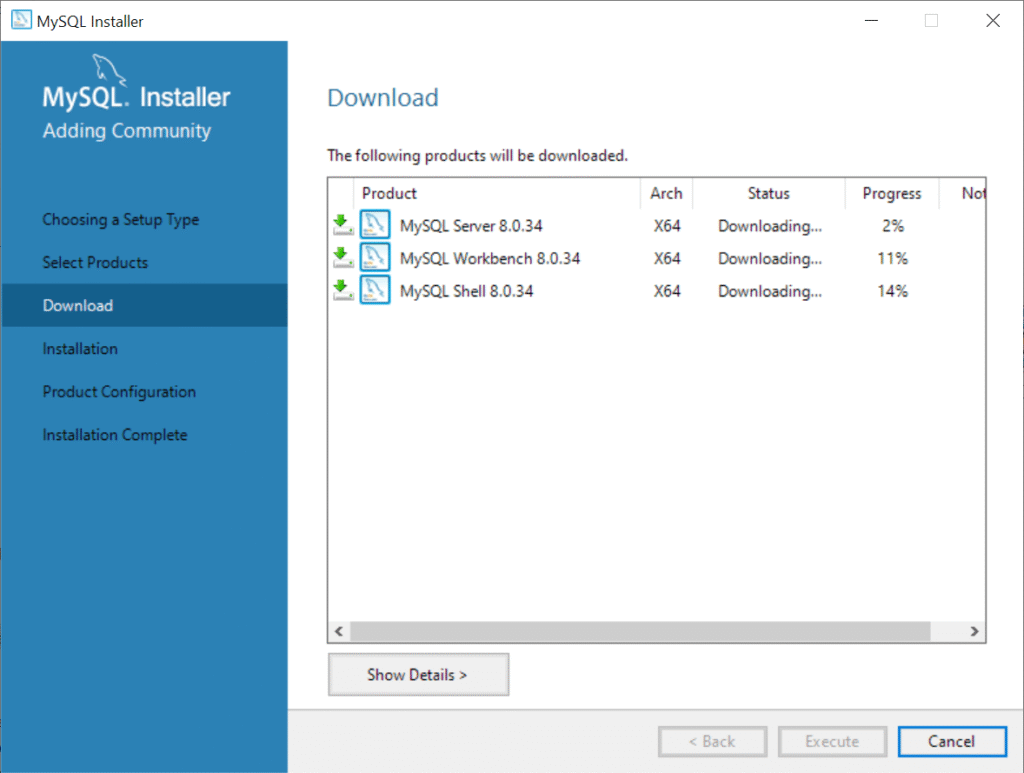
Once all elements are in possession, proceed by activating the Execute function.
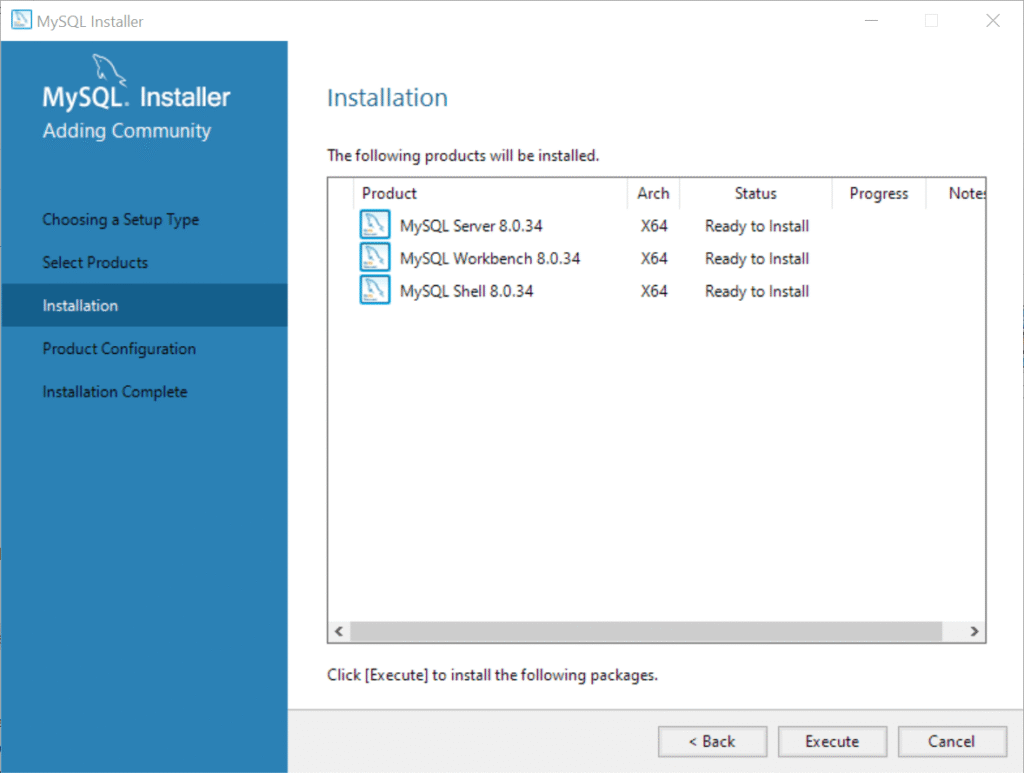
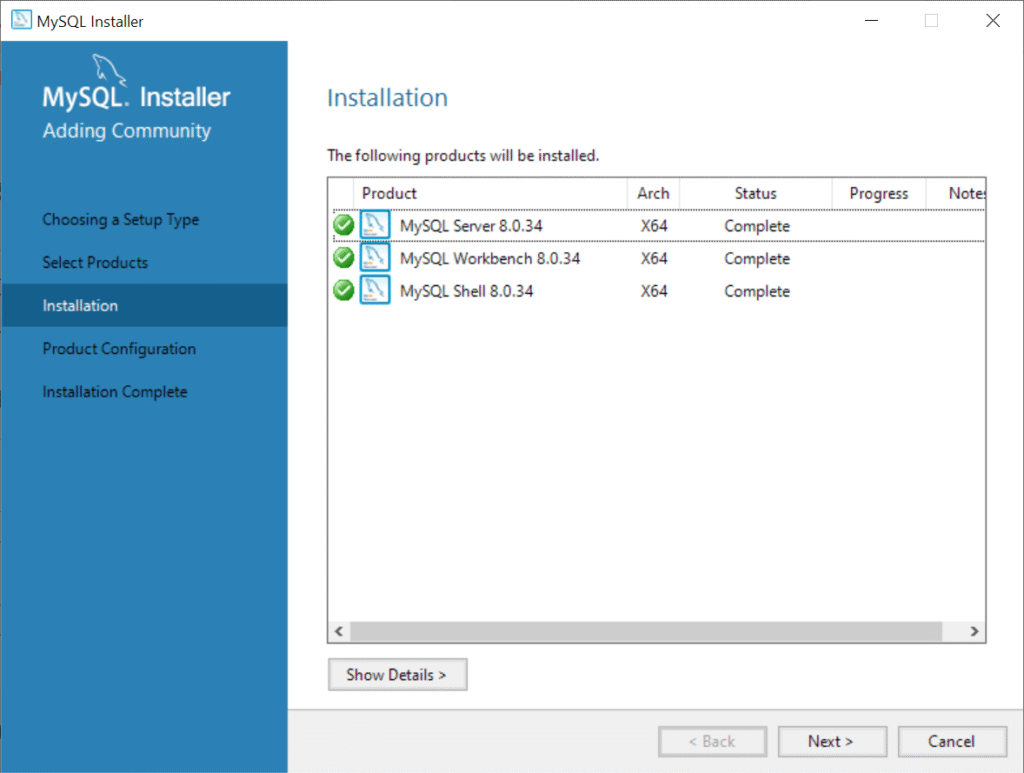
◉ Step 4: Integrating the Components
The suite will now install — an orchestrated deployment that could span a few minutes. Post-installation, click Next to transition toward server configuration.

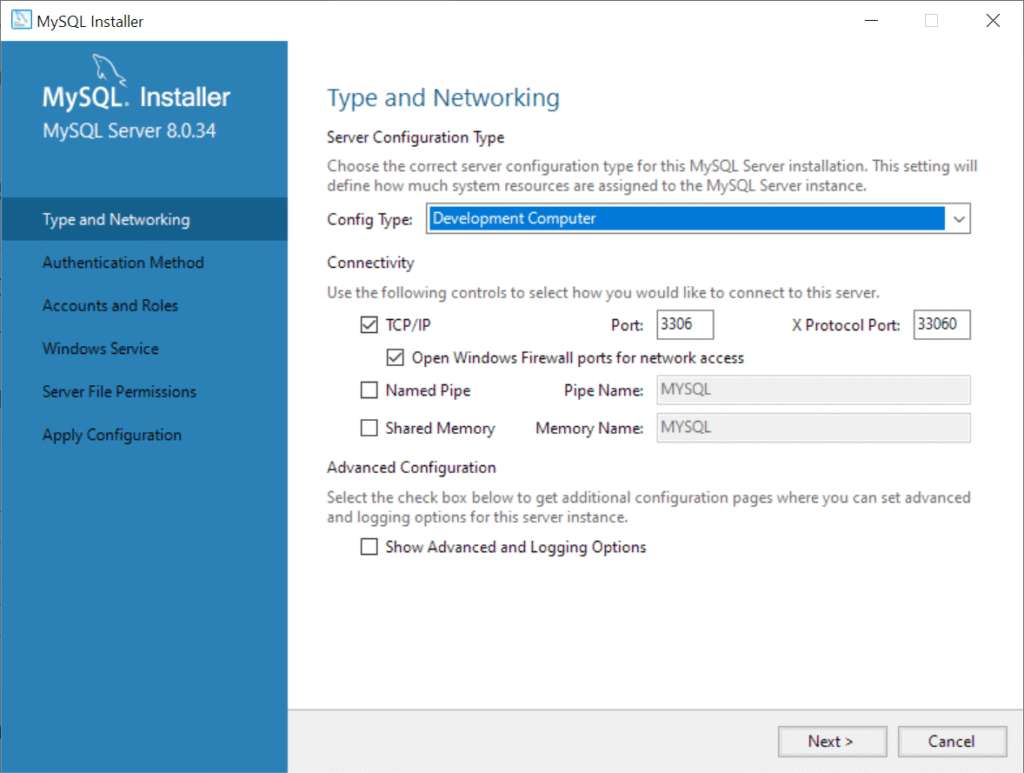
◉ Step 5: Server Calibration
Designate the Development Computer profile during this stage — ideal for local experimentation and learning. Leave ancillary options in their default state and continue forward.
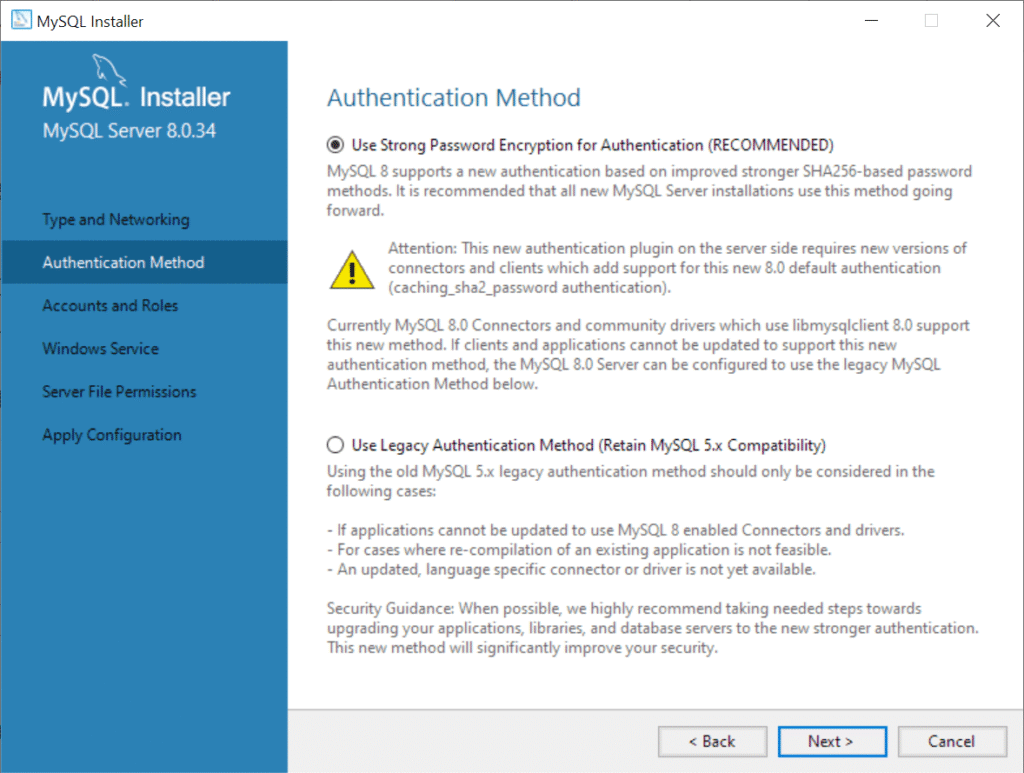
◉ Step 6: Deciding on Authentication Framework
Opt for the Strong Password Encryption method — a prudent and recommended pathway for bolstering your server’s security posture.
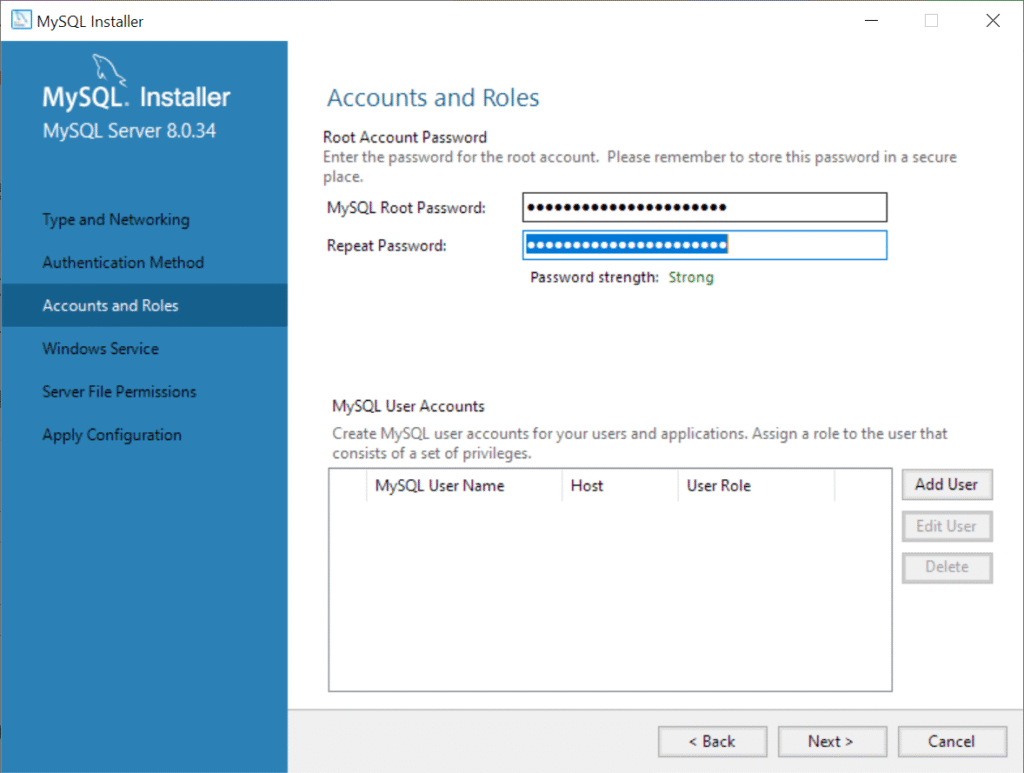
◉ Step 7: Root Account Credentialization
Forge a formidable password for the root account — the gatekeeper of full administrative control. Safeguard it diligently, for it will serve as your key to MySQL’s command sanctum.
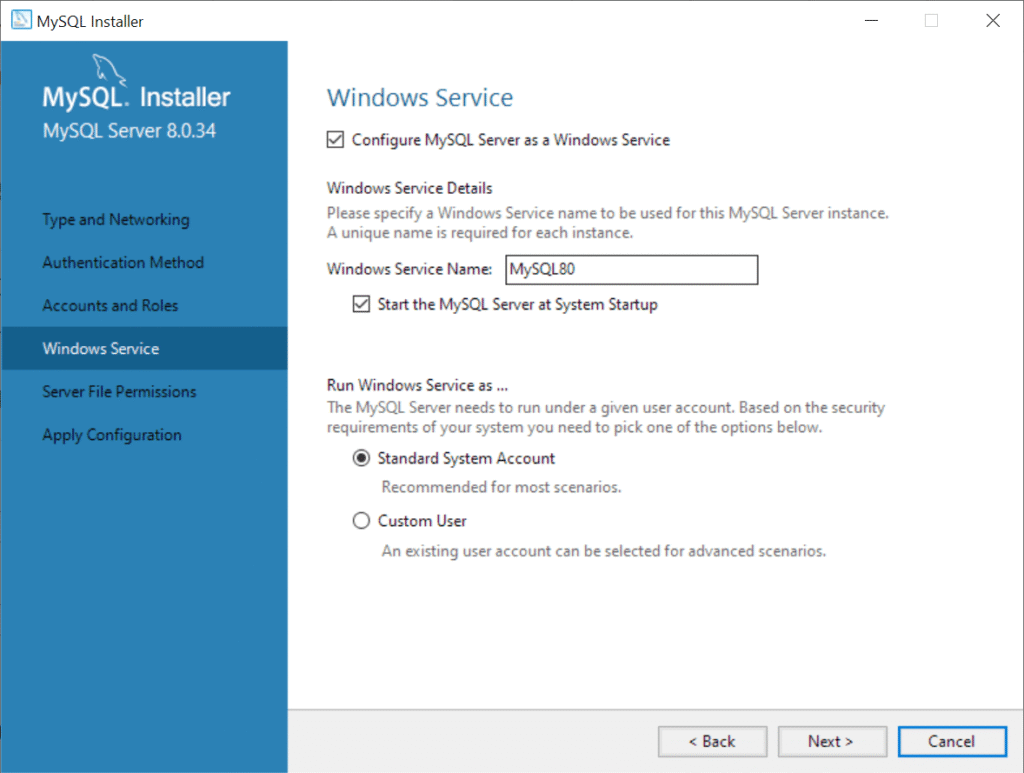
◉ Step 8: In Step 8, create MySQL as a resident service.
Attach MySQL as a background service to Windows now. Assign a distinctive name if desired, and opt to initiate it during system boot for automation.
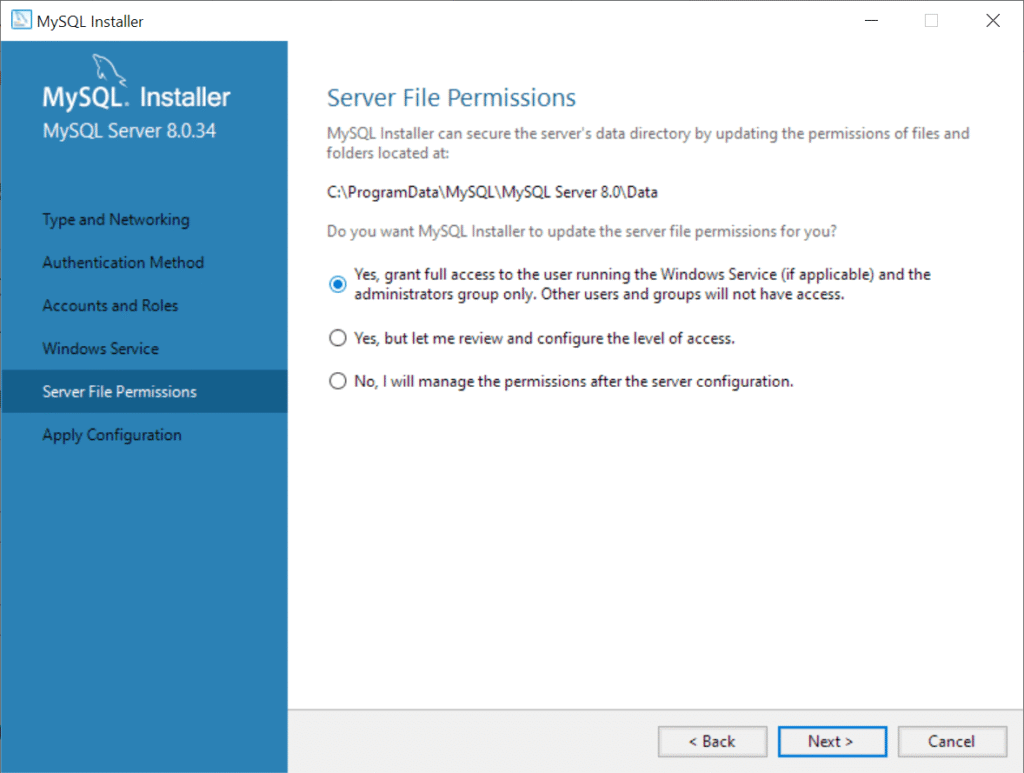
◉ Step 9: Allocating Directory Privileges
Grant MySQL appropriate entitlements to interact with the data directory — a critical step to ensure uninterrupted operation.
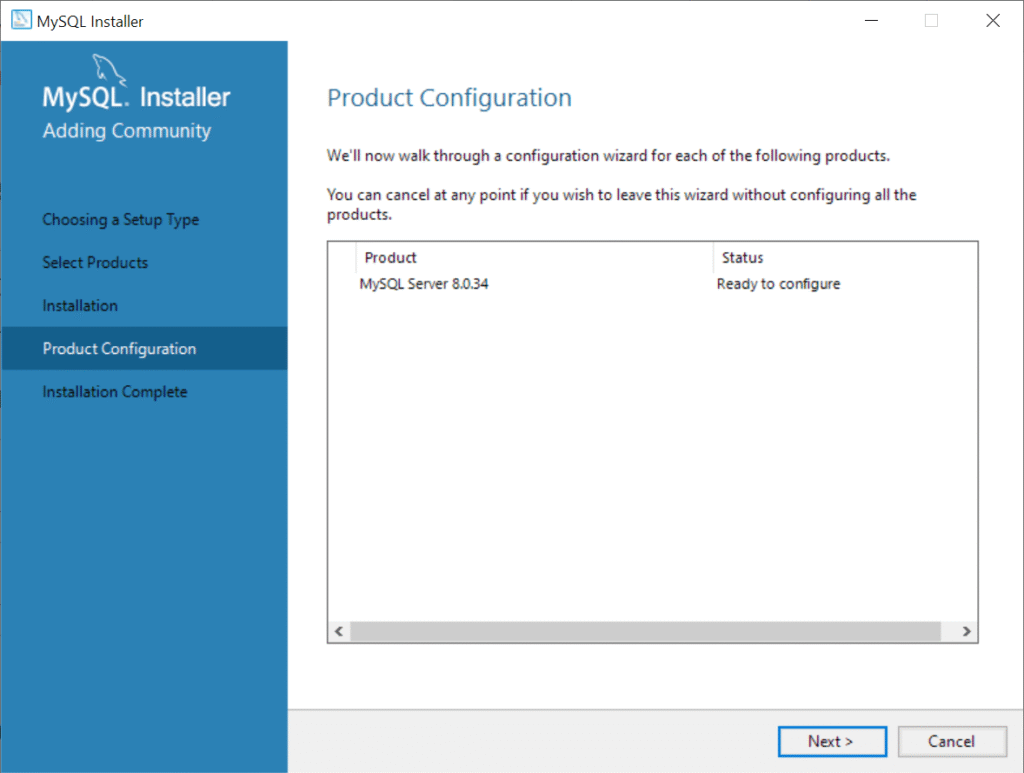
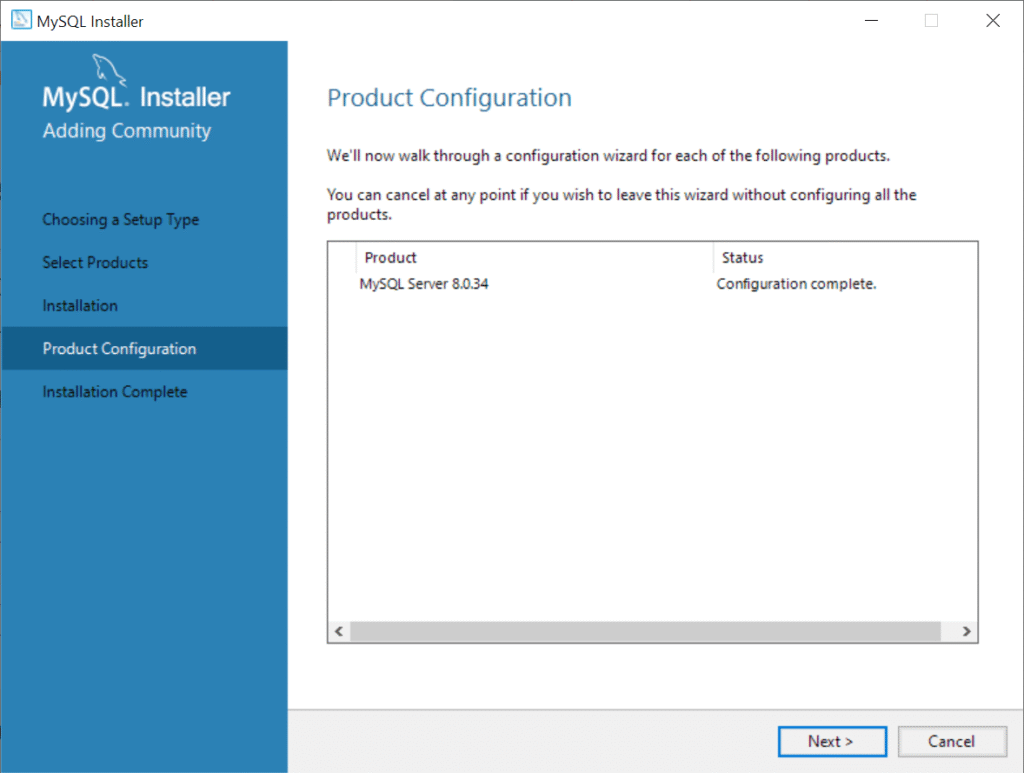
◉ Step 10: Reviewing Configuration Summary
Before sealing the configuration, you’ll be shown a digest of selections. To make the setup happen, validate and press Execute.
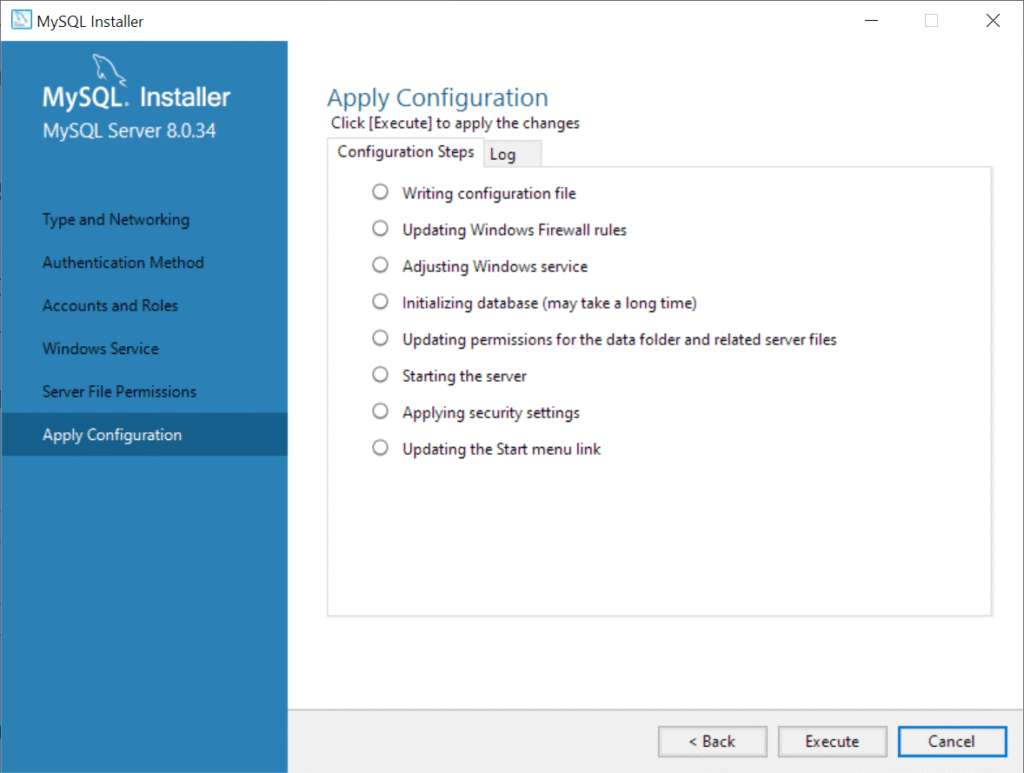
◉ Step 11: Finalizing Configuration
The installer will now carry out the prescribed configurations. Upon successful execution, a status window affirms the operational readiness of MySQL Server.
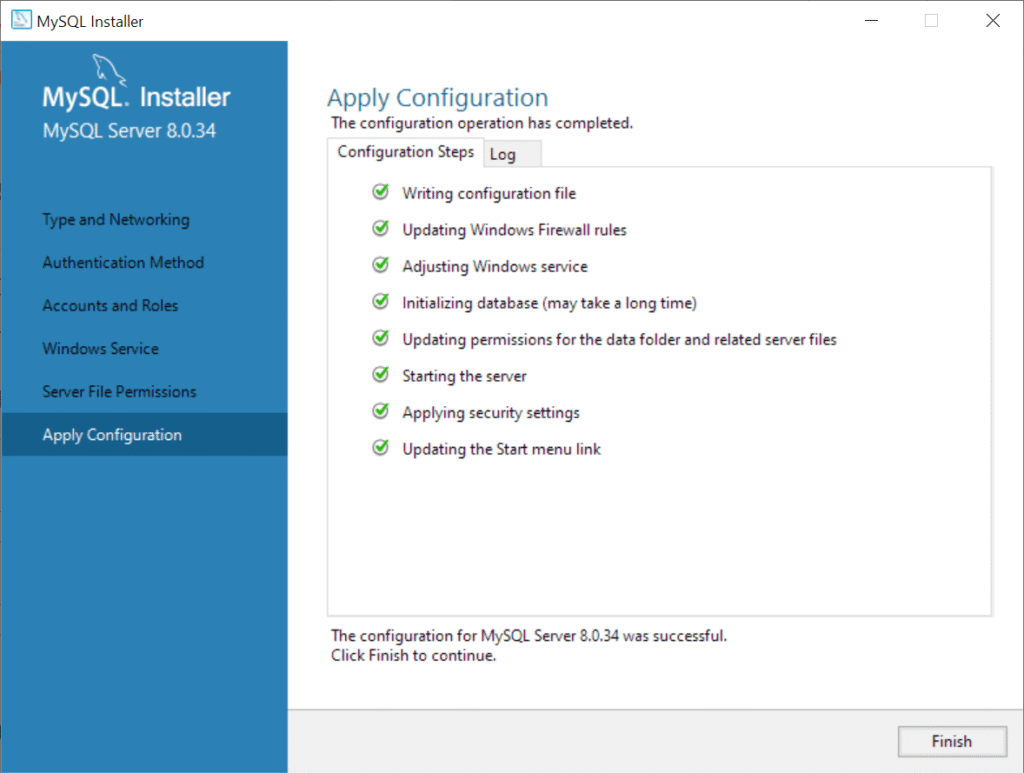
Hit Next to acknowledge and move to the closing stage.
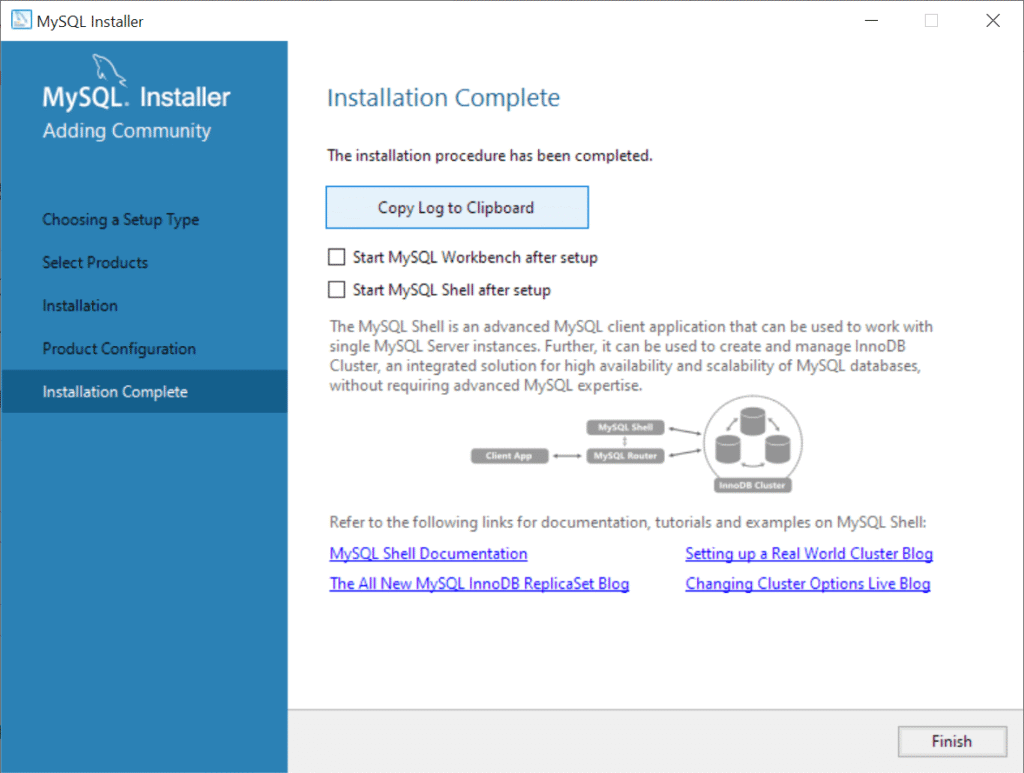
◉ Step 12: Installation Epilogue
A conclusive screen shall signal that the installation voyage has reached safe harbor. Tap Finish to terminate the installer session.
Closing Thoughts Through this meticulous expedition, you’ve harnessed the MySQL Installer to embed MySQL Server — along with its powerful ecosystem of tools — onto your Windows environment. You now stand equipped to begin your database exploration with a fully functioning local MySQL universe.